Well, the coat isn’t exactly epic, but the length of time it took me to get the darn thing finished was. Lots of handsewing can sometimes make me lose my will to live. Anyway, today I managed to sew on the last button and I called it done.
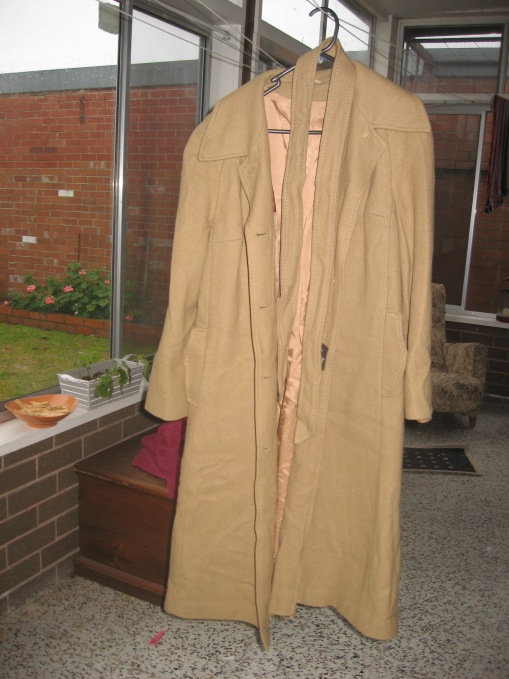
It started out like this:
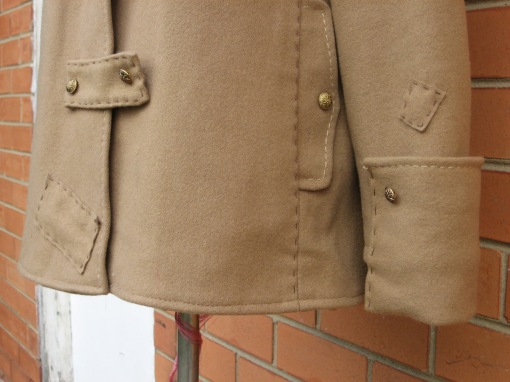
And ended up like this:
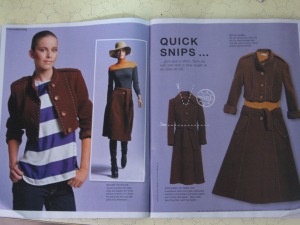
I’d had this coat kicking around, quite literally, for years. I bought it in Vinnies in Toowoomba back when I was at uni, so somewhere between 1992 and 1996. I recall it cost me around $12, but I could be wrong. It has been taking up space in either my wardrobe or my mother’s house ever since then. Then I saw this article in Burda 1/2012. I thought what the hell – I’ve got a coat that has seen better days – why not give it a try?
I wanted a hip-length coat rather than a cropped one like in the article (it being a bit bloody cold down here in Melbourne Town, a longer coat is much appreciated) so I took a back-neck measurement from one of my other coats and chopped old SnugKoat off at the hip. I cut the outside separately from the lining, and cut the lining a little longer. A quick seam up the back to get rid of the remaining vent, then a single-fold hem by machine. This coat is 100% wool, and a nice tight weave, so I’m not too worried about fraying.
Before I reattached the lining, I also made the bust darts a little longer as it was quite a roomy coat on me. The way I did the front meant the closure was off-set, so the coat ended up a better fit.
Thinking of military styles, I decided to do a mandarin collar, epaulettes, and some patch-button-toggle thingies. I had a bag of about 40 brass-coloured buttons which were the perfect colour (also op-shopped years ago!) so I figured throwing a few of those on wouldn’t hurt.
For the collar, I used a jacket with a nice rounded collar to chalk a pattern onto the collar, then cut around it with about 1cm seam allowance. Then I pinned the edges under and steam-ironed the heck out of it, and machine-topstitched it closed. The collar was a bit worn so I added a strip of off-cut fabric, topstitched with a tight zig-zag, to detract from the slightly mothy look.
The button patches and epaulettes were rectangles of offcut fabric, sewn together with one narrow end open, then turned and ironed flat. The open end was machine-stitched into place and folded over to hide the raw edges, then I used some chocolate-brown embroidery thread to topstitch them down onto the coat, continuing the topstitching around the whole patch. I also used the brown thread on the existing pocket flaps, the front seamline and the new cuffs.
The sleeves were oddly short, which led to the creation of the great piratical cuffs. I used the offcuts from the front of the coat, which already had interfacing fused to them, and just machine-stitched them to the ends of the sleeves. Then they were folded up, ironed and top-stitched to hold them in place.
Buttons came last. I had decided against buttonholes as my old Janome isn’t fond of heavy fabrics, and when I came across a baggie of large plastic snaps in one of my many op-shop trips – problem solved! So the buttons are all purely decorative, and they sure look the part!
You may be wondering about the patch on the bottom front of the coat – that was where the last original buttonhole was. It stuck out like a sore thumb, plus there was a big worn patch near it – so a patch was called for. To keep the theme going, I put a couple of other tiny patches on the sleeves where some other holes were a bit obvious.
At least I managed to get it finished before the end of winter!


